| Welcome, Guest |
You have to register before you can post on our site.
|
| Online Users |
There are currently 239 online users.
» 0 Member(s) | 236 Guest(s)
Baidu, Bing, Google
|
| Latest Threads |
Fort Defiance High School...
Forum: Events
Last Post: DLingenfelter
11-16-2025, 09:10 AM
» Replies: 0
» Views: 1,357
|
E46 Repairs, BTDT opinion...
Forum: Technical Discussion
Last Post: Senor_Taylor
08-08-2025, 11:45 AM
» Replies: 11
» Views: 4,380
|
Forum is Updated
Forum: Lounge
Last Post: ViPER1313
10-20-2024, 12:00 AM
» Replies: 0
» Views: 3,358
|
The Cart Before the Horse...
Forum: Member's Projects
Last Post: Senor_Taylor
11-09-2023, 06:36 PM
» Replies: 362
» Views: 240,629
|
I bought a moped
Forum: Member's Projects
Last Post: Senor_Taylor
09-22-2023, 08:52 AM
» Replies: 61
» Views: 22,205
|
Dean V Intro
Forum: Introductions
Last Post: meridombekmha48
03-13-2023, 09:07 AM
» Replies: 10
» Views: 11,219
|
New member
Forum: Introductions
Last Post: meridombekmha48
03-13-2023, 09:07 AM
» Replies: 0
» Views: 861
|
Election Results 2022-202...
Forum: Officer Elections 2022-2023
Last Post: the_awong
05-03-2022, 10:24 PM
» Replies: 2
» Views: 1,912
|
RHD PNZR
Forum: Member's Projects
Last Post: Senor_Taylor
04-29-2022, 10:35 AM
» Replies: 25
» Views: 10,958
|
Perpetual PITA: 2008 BMW ...
Forum: Member's Projects
Last Post: Senor_Taylor
03-16-2022, 03:30 PM
» Replies: 14
» Views: 9,850
|
|
|
| July 22-24 NASA-MA @ VIR |
|
Posted by: Kaan - 07-17-2011, 01:13 PM - Forum: Events
- Replies (60)
|
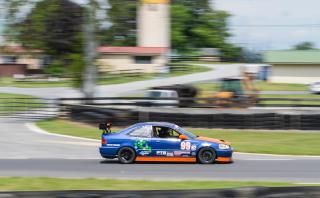 |
A 3 day NASA-MA weekend at VIR with GRM & the UTCC crew! Whos coming?
I know DJ is trying to set records with new wings and stuff... I'll be in the Tech Shed with a special guest... Rex and Julie will be keeping T&S on lock down! Sylvia will be in registration shaking her head at people that cant read the 10 emails sent to them... Matt Leech might be on grid (lol @ his job).
Justin and Casey will be MIA... SO sylvia and I have the grill. I also have 10-12 chicken legs marinading, dogs (skinny dogs and regluar hebrews), 16 burgers, buns for both, and chips.
Ready, Set, GO!
|
|
|
|
| 2011 BMW 328 Detail Write-up Premier Shine |
|
Posted by: premiershine9 - 07-15-2011, 08:49 PM - Forum: Appearance/Cosmetic
- Replies (13)
|
 |
Got a call from a client who had just picked up her brand new 2011 BMW 3 series about a week earlier and her nephew decided to attempt to "wash" her car. He also decided to take a "towel" and scrub two bird bombs away......leaving two nice circular rings (1500- 2000 grit) sandpaper like marks. My guess is that he used a brush or a brillo pad :thumbup: .................... :vomit:
The focus of the detail was to simply perform a new car prep with focus only on the exterior, applying a durable coat of protection and removing the nephews artistic work. 
Car: 2011 Jet Black BMW 328 with X drive
New car prep and protection
Correction of the nephews artistry
Exterior:
Zep Citrus 3:1, 5:1
Sonax Full Effect Wheel Cleaner
Uber spoke brush
Swissvax Pneu Brush
Various other brushes
303 Aerospace Protectant
Chemical Guys Maxi Sudz 2
Uber Blue Clay
Chemical guys luber
Correction:
Menzerna SIP via Uber Orange foam pad
Menzerna Super Finish via Lake Country White foam pad
LSP:
Menzerna Power lock Paint Sealant via Uber Black foam pad
Some Befores:
![[Image: DSC_0524.jpg]](http://i1131.photobucket.com/albums/m553/premiershine9/2011%20JB%203%20Series/DSC_0524.jpg)
![[Image: DSC_0529.jpg]](http://i1131.photobucket.com/albums/m553/premiershine9/2011%20JB%203%20Series/DSC_0529.jpg)
![[Image: DSC_0526.jpg]](http://i1131.photobucket.com/albums/m553/premiershine9/2011%20JB%203%20Series/DSC_0526.jpg)
![[Image: DSC_0531.jpg]](http://i1131.photobucket.com/albums/m553/premiershine9/2011%20JB%203%20Series/DSC_0531.jpg)
Starting out with the wheels....Sonax FE applied and left to do its magic:
![[Image: DSC_0540.jpg]](http://i1131.photobucket.com/albums/m553/premiershine9/2011%20JB%203%20Series/DSC_0540.jpg)
![[Image: DSC_0542.jpg]](http://i1131.photobucket.com/albums/m553/premiershine9/2011%20JB%203%20Series/DSC_0542.jpg)
Pre-Spray with Zep Citrus 5:1 in wheel wells, front and rear fascia, lower half of the body and on the hood where the dealer had obviously applied some sort of wax. The zep safely strips away any was or LSP as well as loosen up any dirt, tar or sap before the 2-bucket phase wash.
![[Image: DSC_0548-1.jpg]](http://i1131.photobucket.com/albums/m553/premiershine9/2011%20JB%203%20Series/DSC_0548-1.jpg)
![[Image: DSC_0549-1.jpg]](http://i1131.photobucket.com/albums/m553/premiershine9/2011%20JB%203%20Series/DSC_0549-1.jpg)
![[Image: DSC_0550-1.jpg]](http://i1131.photobucket.com/albums/m553/premiershine9/2011%20JB%203%20Series/DSC_0550-1.jpg)
![[Image: DSC_0552.jpg]](http://i1131.photobucket.com/albums/m553/premiershine9/2011%20JB%203%20Series/DSC_0552.jpg)
After letting it dwell for 10 minutes, I then followed with a thorough rinse:
![[Image: DSC_0564-1.jpg]](http://i1131.photobucket.com/albums/m553/premiershine9/2011%20JB%203%20Series/DSC_0564-1.jpg)
95% of my jobs are mobile so an investment in a pop-up tent was necessary, this is my second one....automatic shade wherever you go!
![[Image: DSC_0570.jpg]](http://i1131.photobucket.com/albums/m553/premiershine9/2011%20JB%203%20Series/DSC_0570.jpg)
The damaged area after the citrus pre-spray:
![[Image: DSC_0572.jpg]](http://i1131.photobucket.com/albums/m553/premiershine9/2011%20JB%203%20Series/DSC_0572.jpg)
Moving onto the wheels:
Inner Drums were agitated with my Uber Spoke brush:
![[Image: DSC_0578.jpg]](http://i1131.photobucket.com/albums/m553/premiershine9/2011%20JB%203%20Series/DSC_0578.jpg) ![[Image: DSC_0581.jpg]](http://i1131.photobucket.com/albums/m553/premiershine9/2011%20JB%203%20Series/DSC_0581.jpg)
The face of the wheel, around the lugs and the tight spots were of course agitated as well with my designated wheel brush
The wheel wells were then agitated with a brush as well.
All the jams sprayed down with Zep Citrus at 3:1 and agitated with my designated jam brush:
![[Image: DSC_0587.jpg]](http://i1131.photobucket.com/albums/m553/premiershine9/2011%20JB%203%20Series/DSC_0587.jpg)
Following this came the first wash using the 2-bucket method, sorry for lack of pics! I was hauling ass to get done before it got dark.....started the detail at 5:30 at night!
Following the first wash, I then thoroughly rinsed and dried the car. The car was then sprayed down again with water and my Chemical Guys Luber Clay lube and the car was fully clayed with Uber Blue Clay.
Not much contamination or oxidation found.....it is a brand new car. However I did run into a trouble spot here or there!
![[Image: DSC_0593.jpg]](http://i1131.photobucket.com/albums/m553/premiershine9/2011%20JB%203%20Series/DSC_0593.jpg)
![[Image: DSC_0594.jpg]](http://i1131.photobucket.com/albums/m553/premiershine9/2011%20JB%203%20Series/DSC_0594.jpg)
I then thoroughly rinsed the car........prepared a bucket full of clean water and another with my sudz solution (2-bucket method) and then fully re-washed the car AGAIN.
![[Image: DSC_0595-1.jpg]](http://i1131.photobucket.com/albums/m553/premiershine9/2011%20JB%203%20Series/DSC_0595-1.jpg)
The car was then rinsed and fully dried.
Correction process________
The dealer had left some pretty bad swirl marks and being that I was ahead of schedule I went ahead and polished out a couple areas other than the damaged area.
I chose to two-step polish with my two chosen polishes (see above).
Being that this is BMW Jet Black.... arguably BMW's most difficult paint to maintain I knew this was going to be an adventure. I have performed full corrections on two other JB BMW 3 series as well as a Z3 so I've had some experience using the chosen polish combo on this specific paint.
I chose to correct the two front fenders, the hood, rear decklid and of course the damaged area.
Enough talk....moar pics
SIP Breaking down with a Uber orange foam pad
![[Image: DSC_0605.jpg]](http://i1131.photobucket.com/albums/m553/premiershine9/2011%20JB%203%20Series/DSC_0605.jpg)
![[Image: DSC_0609.jpg]](http://i1131.photobucket.com/albums/m553/premiershine9/2011%20JB%203%20Series/DSC_0609.jpg)
IPA wipe-downs were of course performed in between each polish step to remove any oils from the polish that might be filling any swirls or defects....causing a false correction reading.
The damaged area was hit with two passes of SIP and one pass of Menz 106fa to finish it out. Turns out the nephews artistic work was pretty hard to remove!
The car was then treated to a nice coat of Menzerna Powerlock Paint Sealant via my Flex DA with a black pad. All glass was cleaned inside and out, all seals and weatherstripping were sealed with 303.
Afters: Light was running out.....nothing I could do
![[Image: DSC_0622.jpg]](http://i1131.photobucket.com/albums/m553/premiershine9/2011%20JB%203%20Series/DSC_0622.jpg)
![[Image: DSC_0625.jpg]](http://i1131.photobucket.com/albums/m553/premiershine9/2011%20JB%203%20Series/DSC_0625.jpg)
![[Image: DSC_0630-1.jpg]](http://i1131.photobucket.com/albums/m553/premiershine9/2011%20JB%203%20Series/DSC_0630-1.jpg)
![[Image: DSC_0632.jpg]](http://i1131.photobucket.com/albums/m553/premiershine9/2011%20JB%203%20Series/DSC_0632.jpg)
![[Image: DSC_0633.jpg]](http://i1131.photobucket.com/albums/m553/premiershine9/2011%20JB%203%20Series/DSC_0633.jpg)
![[Image: DSC_0636-1.jpg]](http://i1131.photobucket.com/albums/m553/premiershine9/2011%20JB%203%20Series/DSC_0636-1.jpg)
![[Image: DSC_0637-1.jpg]](http://i1131.photobucket.com/albums/m553/premiershine9/2011%20JB%203%20Series/DSC_0637-1.jpg)
![[Image: DSC_0638-1.jpg]](http://i1131.photobucket.com/albums/m553/premiershine9/2011%20JB%203%20Series/DSC_0638-1.jpg)
![[Image: DSC_0639.jpg]](http://i1131.photobucket.com/albums/m553/premiershine9/2011%20JB%203%20Series/DSC_0639.jpg)
![[Image: DSC_0640.jpg]](http://i1131.photobucket.com/albums/m553/premiershine9/2011%20JB%203%20Series/DSC_0640.jpg)
![[Image: DSC_0648.jpg]](http://i1131.photobucket.com/albums/m553/premiershine9/2011%20JB%203%20Series/DSC_0648.jpg)
That damaged area after:
![[Image: DSC_0652.jpg]](http://i1131.photobucket.com/albums/m553/premiershine9/2011%20JB%203%20Series/DSC_0652.jpg)
Good night BMW
![[Image: DSC_0620-1.jpg]](http://i1131.photobucket.com/albums/m553/premiershine9/2011%20JB%203%20Series/DSC_0620-1.jpg)
Total time- Just under 4 hours
Thanks for looking!
- Dan K.
|
|
|
|
| Revvn low poor acceleration |
|
Posted by: MRicci - 07-13-2011, 05:37 PM - Forum: Technical Discussion
- Replies (10)
|
|
So the car i bought from Jake has yet to let me down, but its still not running the way I want it to.
Not sure how many people here got to experience it themselves, but there is something that is preventing the car from accelerating to its fullest potential.
Ill try to explain as best I can.
When the car is cold, it starts up and occasionally and it will give a bit of hesitation driving off for the first and second time. When you get past that, and give it a little gas, it accelerates exactly like it should. As soon as the car warms up, the acceleration becomes lacking. The car cruises wonderfully, 80 mph no problem, but as soon as you need to take off from a light, you need to put your foot down to get it to accelerate half decently.
If you haven't seen the project thread, I've replaced the distributor cap and rotor, the plugs, refurbished the injectors completely and verified their function.
I have also tested the coil and wires for resistance and they were all in spec.
When the engine idles, it seems almost perfect but the motor shakes a little bit, like its misfiring. A mechanic told me that he was sure it's misfiring and he told me one of the exhaust valves isn't closing. I ran a compression test and all 6 cylinders showed 180 psi. No leaks at all.
I've been suspicious of the exhaust lately as it has been making a rattling noise upon acceleration. I currently have it disconnected at the manifold because the gaskets are rusted away. As soon as i remove the cat completely, I want to inspect it and make sure its not clogged.
I ran the car with no exhaust and it seemed to run similar to what it was with an exhaust. The engine was not perfectly smooth like it should be, and there was also the same type of hesitation while starting off. (it was super loud and awesome though)
Of course I didn't want to take the open headed e30 out for a spin on the main roads as the police would be on my case within a mile. Its back in the garage right now and I'm trying to find out as much as I can on the internet.
I also cranked the starter with the plugs out to check for spark strength and they emitted an orange spark. This could also be a problem but it doesn't make sense that the car sometimes accelerates extremely well, then just quits after 5 minutes.
Perhaps a fault in the computer?
I hope you guys have some good advice for me, the last thing I want to do is take it into a shop.
I suppose a few things I haven't tested should be considered as culprits. The fuel pressure regulator (unlikely), The motronic computer,
|
|
|
|
| Subscribe to MM's Google Calendar |
|
Posted by: Jake - 07-12-2011, 11:03 AM - Forum: Campus Events
- No Replies
|
 |
Our old /calendar page was pretty basic and hard to deal with/update. I've switched it out for Google Calendar, which is pretty easy to integrate, update and (bonus!) you can subscribe to it so all of the MM events show up on your phone or computer with no effort on your part :thumbup:
To subscribe... - Log in to your Google account at <!-- m --><a class="postlink" href="http://calendar.google.com">http://calendar.google.com</a><!-- m -->
- Under "Other Calendars" on the left column, click the gray Add link and choose Add a Friend's Calendar.
- Enter madisonmotorsports [at] gmail [dot] com (obviously, as a real email address, no silly brackets).
There you go... should make keeping track of events easier...
|
|
|
|
| Subscribe to MM's Google Calendar |
|
Posted by: Jake - 07-12-2011, 11:02 AM - Forum: Events
- Replies (8)
|
|
Our old /calendar page was pretty basic and hard to deal with/update. I've switched it out for Google Calendar, which is pretty easy to integrate, update and (bonus!) you can subscribe to it so all of the MM events show up on your phone or computer with no effort on your part :thumbup:
To subscribe... - Log in to your Google account at <!-- m --><a class="postlink" href="http://calendar.google.com">http://calendar.google.com</a><!-- m -->
- Under "Other Calendars" on the left column, click the gray Add link and choose Add a Friend's Calendar.
- Enter madisonmotorsports [at] gmail [dot] com (obviously, as a real email address, no silly brackets).
There you go... should make keeping track of events easier...
|
|
|
|
| Spec Miata into EV at SPR Sunday... |
|
Posted by: Ole - 07-11-2011, 04:39 PM - Forum: Lounge
- Replies (10)
|
|
Only what I have heard: A car was into the tires at exit of T8. EV pulled out of crossover near T-3 I assume to recover car in T8, they pulled right in front of an SM. Don't know if flags were out but apparently there was confusion. SM made... contact with EV (Ford F250 or 350) and somehow truck was into tires and on top of concrete barrier. Not sure who was at fault and doesn't really matter, everyone was pretty much ok, minor bumps and bruises. They did RED Flag the race at that point. Car and truck were damaged from my distant view.
Miata - 1
F350 - 0
|
|
|
|
| DIY: Front Wheel Bearings E36 |
|
Posted by: D_Eclipse9916 - 07-11-2011, 12:58 PM - Forum: Technical Discussion
- Replies (6)
|
|
I figured we havent had any DIYs in a while, and I am just getting started logging and being more complete with all my installs/maintenance on the BMW M3. Figured this would help since a lot of us own M3s/track m3s/fix busted e36s.
Difficulty: Intermediate
Tools Required:
Flathead Screwdriver
46MM Socket- 1/2 inch drive
Jack (and of course jack stands)
Breaker Bar 1/2 inch drive
3/8 Socket wrench
16MM Socket
Lug wrench and socket
1/2 inch drive torque Wrench
C-Clamp
Hammer
5.5MM Allen Socket/Wrench
Parts: New Hub/wheel bearing (its one part)
Studs/nuts (if using em)
New hub nut/dust cover
Loc-tite
Automotive grease
Step 1: Jack car up, use jack stands, and remove wheel.
Step 2: Grab a box or something to hold up the caliper. Remove (2) Caliper Bolts holding Caliper to spindle using a 16mm socket and 3/8 Socket Wrench. Slide caliper off and rest on box or wire. Important: Do not let caliper hang or put pressure on caliper line.
Step 3: Remove rotor. Stock BMWs use a 5.5mm allen-head bolt. Remove, along with rotor.
Step 4: In the middle of the hub, there should be a round "cap". Using a flat head screwdriver, remove the dust cap. May have to use the hammer with flathead to deform and remove.
![[Image: ddc0d838.jpg]](http://i3.photobucket.com/albums/y81/D_Eclipse9916/ddc0d838.jpg)
Step 5: Once you have removed the cap, you will be able to see a large 46MM Nut holding the hub to the spindle. There should be a small piece of metal that is deformed to ensure the wheel bearing nut does not come lose. Using your flathead screwdriver, pry back so that the nut can be unscrewed.
![[Image: 9f200064.jpg]](http://i3.photobucket.com/albums/y81/D_Eclipse9916/9f200064.jpg)
![[Image: 3f166c31.jpg]](http://i3.photobucket.com/albums/y81/D_Eclipse9916/3f166c31.jpg)
Step 6: Take your 46MM Socket and breaker bar, and put on wheel bearing nut. Make sure it is completely flat and against the nut. Use some strength and remove the nut. It may require using extra leverage on the breaker bar by also putting your jack handle on the breaker bar. Once it cracks loose, it should be relatively easy to thread nut off.
Step 7: A lot of times grease is missing from the smooth part of the spindle past the threads. Throw some grease on there to aid easy removal of hub. Using both hands on either side of the hub, just pull on the hub and it should slide off with a bit of tugging and pulling. (You can use a hammer to aid, but be careful with light taps moving around the hub for consistent pressure).
Step 8: Clean spindle with a clean towel. Then use automotive grease to grease the "slide" that the wheel bearing slides off of. Ensure there is no grease on the threads.
![[Image: 46533caa.jpg]](http://i3.photobucket.com/albums/y81/D_Eclipse9916/46533caa.jpg)
Step 9: Using both hands and equal force all the way around, slide hub bearing on, may take a little force at first.
Step 10: Ensure that the wheel bearing rotates cleanly and smoothly and take your replacement new nut and thread on. Torque this large 46MM nut to 214FT/LBS. Then using the flat-head and hammer, chisel the nut in the open voids to ensure nut does not loosen itself with vibration.
Step 10: Install new dust cap, rotor, and caliper. This is where the C-clamps comes in, you may need to push the caliper piston back in to make sure the caliper goes over the rotor. Torque your wheels and your all set.
![[Image: faee6743.jpg]](http://i3.photobucket.com/albums/y81/D_Eclipse9916/faee6743.jpg)
Optional: Installing new studs.
Once you have finished installing the hub and before putting on the new rotor, you may have chosen to switch to studs. To install these studs, first ensure all threads are clean in both the hub and the studs. Bimmerworld's studs comes with heat-activated lock-tite, but if yours are not and have none, please use loc-tite to ensure the studs will not back out.
![[Image: 3b0049db.jpg]](http://i3.photobucket.com/albums/y81/D_Eclipse9916/3b0049db.jpg)
![[Image: 1cd848ca.jpg]](http://i3.photobucket.com/albums/y81/D_Eclipse9916/1cd848ca.jpg)
Thread them in by hand, then by using the double-nut method (thread one nut on, then the other nut securely to the first nut), tighten to 13ft/lbs or hand-snug. Repeat for all five and your done!
![[Image: 7c6da13c.jpg]](http://i3.photobucket.com/albums/y81/D_Eclipse9916/7c6da13c.jpg)
|
|
|
|
|


![[Image: 270207_10150234392791744_623891743_78965...5209_n.jpg]](http://a6.sphotos.ak.fbcdn.net/hphotos-ak-snc6/270207_10150234392791744_623891743_7896504_7605209_n.jpg)
![[Image: 281587_10150234392766744_623891743_78965...0506_n.jpg]](http://a7.sphotos.ak.fbcdn.net/hphotos-ak-ash4/281587_10150234392766744_623891743_7896503_7610506_n.jpg)
![[Image: 285347_10150234392801744_623891743_78965...8431_n.jpg]](http://a4.sphotos.ak.fbcdn.net/hphotos-ak-snc6/285347_10150234392801744_623891743_7896505_1658431_n.jpg)
![[Image: 5943994225_a472fee761_b.jpg]](http://farm7.static.flickr.com/6126/5943994225_a472fee761_b.jpg)
![[Image: DSC_0655.jpg]](http://i1131.photobucket.com/albums/m553/premiershine9/AUDI%20A4/DSC_0655.jpg)
![[Image: DSC_0656.jpg]](http://i1131.photobucket.com/albums/m553/premiershine9/AUDI%20A4/DSC_0656.jpg)
![[Image: DSC_0657.jpg]](http://i1131.photobucket.com/albums/m553/premiershine9/AUDI%20A4/DSC_0657.jpg)
![[Image: DSC_0658-1.jpg]](http://i1131.photobucket.com/albums/m553/premiershine9/AUDI%20A4/DSC_0658-1.jpg)
![[Image: DSC_0659.jpg]](http://i1131.photobucket.com/albums/m553/premiershine9/AUDI%20A4/DSC_0659.jpg)
![[Image: DSC_0660.jpg]](http://i1131.photobucket.com/albums/m553/premiershine9/AUDI%20A4/DSC_0660.jpg)
![[Image: DSC_0661.jpg]](http://i1131.photobucket.com/albums/m553/premiershine9/AUDI%20A4/DSC_0661.jpg)
![[Image: DSC_0662.jpg]](http://i1131.photobucket.com/albums/m553/premiershine9/AUDI%20A4/DSC_0662.jpg)
![[Image: DSC_0663.jpg]](http://i1131.photobucket.com/albums/m553/premiershine9/AUDI%20A4/DSC_0663.jpg)
![[Image: DSC_0664.jpg]](http://i1131.photobucket.com/albums/m553/premiershine9/AUDI%20A4/DSC_0664.jpg)
![[Image: DSC_0665.jpg]](http://i1131.photobucket.com/albums/m553/premiershine9/AUDI%20A4/DSC_0665.jpg)
![[Image: DSC_0666.jpg]](http://i1131.photobucket.com/albums/m553/premiershine9/AUDI%20A4/DSC_0666.jpg)
![[Image: DSC_0667.jpg]](http://i1131.photobucket.com/albums/m553/premiershine9/AUDI%20A4/DSC_0667.jpg)
![[Image: DSC_0668.jpg]](http://i1131.photobucket.com/albums/m553/premiershine9/AUDI%20A4/DSC_0668.jpg)
![[Image: DSC_0669.jpg]](http://i1131.photobucket.com/albums/m553/premiershine9/AUDI%20A4/DSC_0669.jpg)
![[Image: DSC_0670.jpg]](http://i1131.photobucket.com/albums/m553/premiershine9/AUDI%20A4/DSC_0670.jpg)
![[Image: DSC_0671.jpg]](http://i1131.photobucket.com/albums/m553/premiershine9/AUDI%20A4/DSC_0671.jpg)
![[Image: DSC_0672.jpg]](http://i1131.photobucket.com/albums/m553/premiershine9/AUDI%20A4/DSC_0672.jpg)
![[Image: DSC_0673.jpg]](http://i1131.photobucket.com/albums/m553/premiershine9/AUDI%20A4/DSC_0673.jpg)
![[Image: DSC_0674.jpg]](http://i1131.photobucket.com/albums/m553/premiershine9/AUDI%20A4/DSC_0674.jpg)
![[Image: DSC_0675-1.jpg]](http://i1131.photobucket.com/albums/m553/premiershine9/AUDI%20A4/DSC_0675-1.jpg)
![[Image: DSC_0676.jpg]](http://i1131.photobucket.com/albums/m553/premiershine9/AUDI%20A4/DSC_0676.jpg)
![[Image: DSC_0677-1.jpg]](http://i1131.photobucket.com/albums/m553/premiershine9/AUDI%20A4/DSC_0677-1.jpg)
![[Image: DSC_0678.jpg]](http://i1131.photobucket.com/albums/m553/premiershine9/AUDI%20A4/DSC_0678.jpg)
![[Image: DSC_0680-1.jpg]](http://i1131.photobucket.com/albums/m553/premiershine9/AUDI%20A4/DSC_0680-1.jpg)
![[Image: DSC_0681.jpg]](http://i1131.photobucket.com/albums/m553/premiershine9/AUDI%20A4/DSC_0681.jpg)
![[Image: DSC_0683.jpg]](http://i1131.photobucket.com/albums/m553/premiershine9/AUDI%20A4/DSC_0683.jpg)
![[Image: DSC_0684.jpg]](http://i1131.photobucket.com/albums/m553/premiershine9/AUDI%20A4/DSC_0684.jpg)
![[Image: DSC_0686.jpg]](http://i1131.photobucket.com/albums/m553/premiershine9/AUDI%20A4/DSC_0686.jpg)
![[Image: DSC_0688-1.jpg]](http://i1131.photobucket.com/albums/m553/premiershine9/AUDI%20A4/DSC_0688-1.jpg)
![[Image: DSC_0689.jpg]](http://i1131.photobucket.com/albums/m553/premiershine9/AUDI%20A4/DSC_0689.jpg)
![[Image: DSC_0690.jpg]](http://i1131.photobucket.com/albums/m553/premiershine9/AUDI%20A4/DSC_0690.jpg)
![[Image: DSC_0691.jpg]](http://i1131.photobucket.com/albums/m553/premiershine9/AUDI%20A4/DSC_0691.jpg)
![[Image: DSC_0700.jpg]](http://i1131.photobucket.com/albums/m553/premiershine9/AUDI%20A4/DSC_0700.jpg)
![[Image: DSC_0701.jpg]](http://i1131.photobucket.com/albums/m553/premiershine9/AUDI%20A4/DSC_0701.jpg)
![[Image: DSC_0702.jpg]](http://i1131.photobucket.com/albums/m553/premiershine9/AUDI%20A4/DSC_0702.jpg)
![[Image: DSC_0704.jpg]](http://i1131.photobucket.com/albums/m553/premiershine9/AUDI%20A4/DSC_0704.jpg)
![[Image: DSC_0705.jpg]](http://i1131.photobucket.com/albums/m553/premiershine9/AUDI%20A4/DSC_0705.jpg)
![[Image: DSC_0709.jpg]](http://i1131.photobucket.com/albums/m553/premiershine9/AUDI%20A4/DSC_0709.jpg)
![[Image: DSC_0711.jpg]](http://i1131.photobucket.com/albums/m553/premiershine9/AUDI%20A4/DSC_0711.jpg)
![[Image: DSC_0745.jpg]](http://i1131.photobucket.com/albums/m553/premiershine9/AUDI%20A4/DSC_0745.jpg)
![[Image: DSC_0717.jpg]](http://i1131.photobucket.com/albums/m553/premiershine9/AUDI%20A4/DSC_0717.jpg)
![[Image: DSC_0718.jpg]](http://i1131.photobucket.com/albums/m553/premiershine9/AUDI%20A4/DSC_0718.jpg)
![[Image: DSC_0721.jpg]](http://i1131.photobucket.com/albums/m553/premiershine9/AUDI%20A4/DSC_0721.jpg)
![[Image: DSC_0722.jpg]](http://i1131.photobucket.com/albums/m553/premiershine9/AUDI%20A4/DSC_0722.jpg)
![[Image: DSC_0726.jpg]](http://i1131.photobucket.com/albums/m553/premiershine9/AUDI%20A4/DSC_0726.jpg)
![[Image: DSC_0727.jpg]](http://i1131.photobucket.com/albums/m553/premiershine9/AUDI%20A4/DSC_0727.jpg)
![[Image: DSC_0730.jpg]](http://i1131.photobucket.com/albums/m553/premiershine9/AUDI%20A4/DSC_0730.jpg)
![[Image: DSC_0734.jpg]](http://i1131.photobucket.com/albums/m553/premiershine9/AUDI%20A4/DSC_0734.jpg)
![[Image: DSC_0737.jpg]](http://i1131.photobucket.com/albums/m553/premiershine9/AUDI%20A4/DSC_0737.jpg)
![[Image: DSC_0738.jpg]](http://i1131.photobucket.com/albums/m553/premiershine9/AUDI%20A4/DSC_0738.jpg)
![[Image: DSC_0740.jpg]](http://i1131.photobucket.com/albums/m553/premiershine9/AUDI%20A4/DSC_0740.jpg)
![[Image: DSC_0743.jpg]](http://i1131.photobucket.com/albums/m553/premiershine9/AUDI%20A4/DSC_0743.jpg)